Iceline Game Tunnel Installation Guide
Iceline Shield's Game Tunnel connects your game server to our network over a custom, purpose-built tunnel not a generic point-to-point config. It hides your origin IP from players and attackers, absorbs DDoS attacks at the edge before they ever reach your box, and can run alongside any existing VPN or tunnel setup you already use internally, since it's a completely separate tunnel and implementation.
What you'll need before you start
- Access to your Iceline Shield panel
- Your game server's port number(s) (TCP/UDP)
- A setup code generated from the panel (Game Tunnel → choose your OS)
- Windows: Administrator access on the machine running your game
- Linux: SSH access with sudo/root
🪟 Windows Installation
Step 1 — Open Game Tunnel in your Shield panel
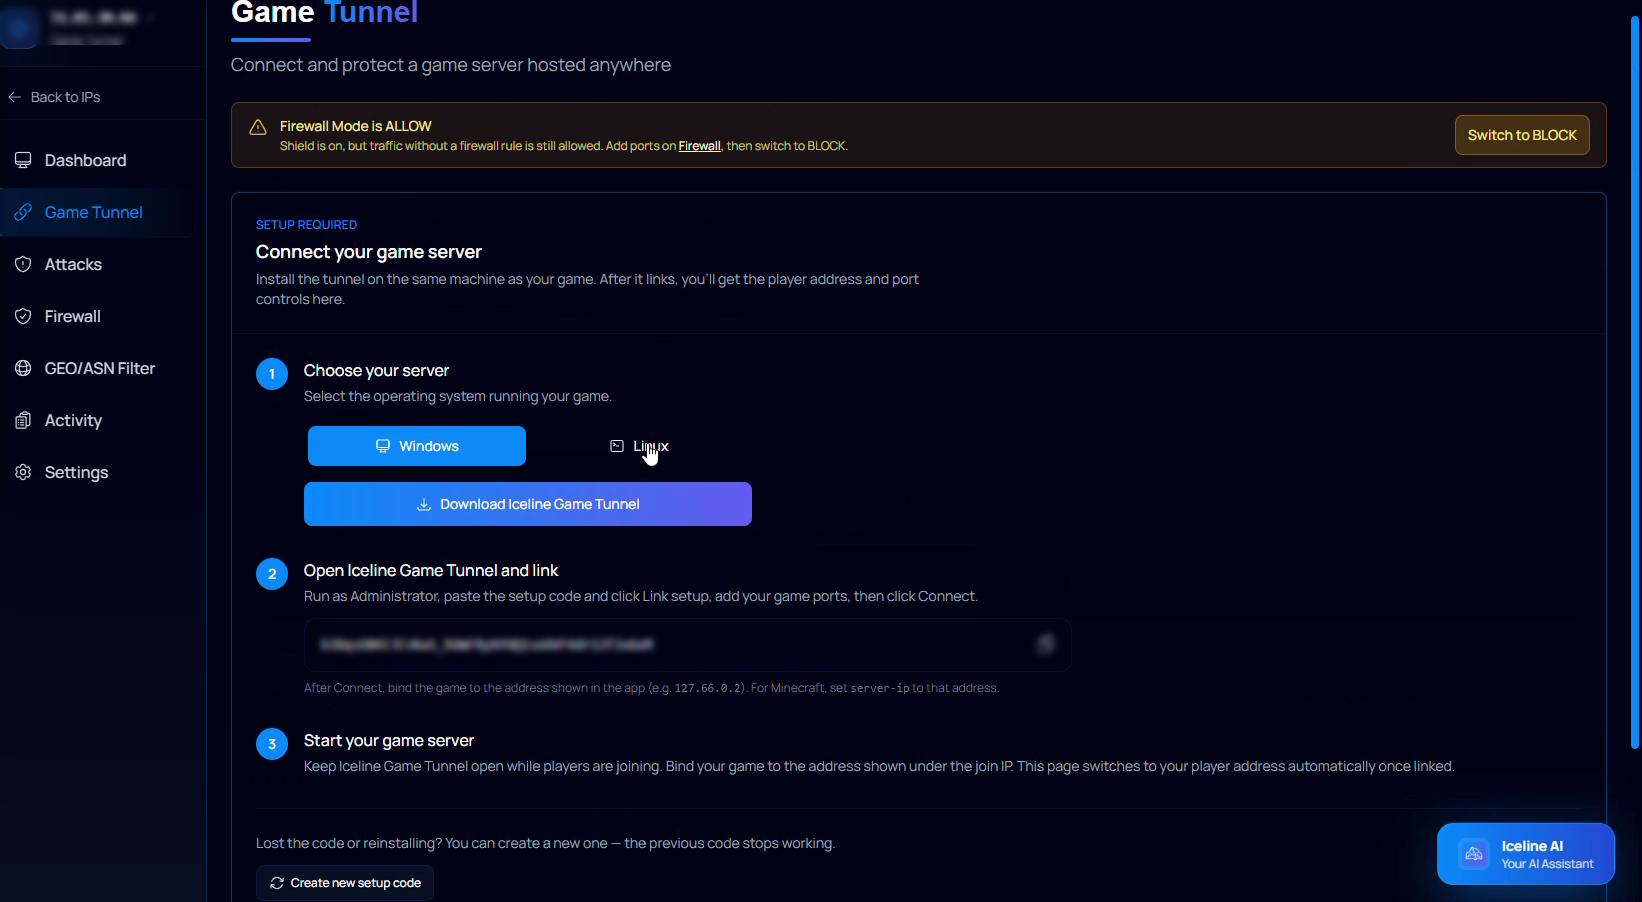
Log in to your Iceline Shield panel and select Game Tunnel from the sidebar.
Step 2 — Choose Windows and download the agent
Under Choose your server, select Windows, then click Download Iceline Game Tunnel.
Step 3 — Run the installer
On the machine running your game server, run the downloaded Iceline_Game_Tunnel.exe.
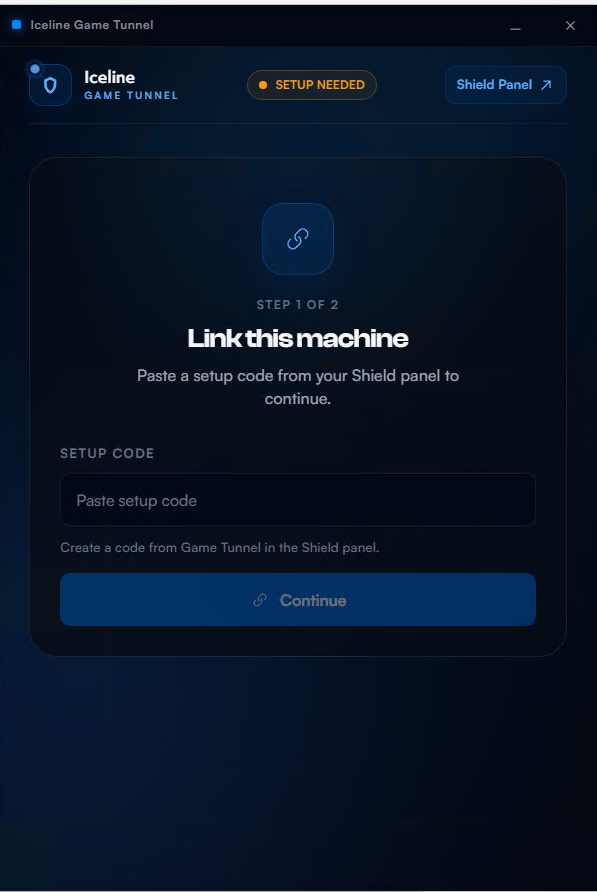
Step 4 — Link the machine with your setup code
Launch Iceline Game Tunnel (run as Administrator). On Step 1 of 2 — Link this machine, paste the setup code from the panel and click Continue.
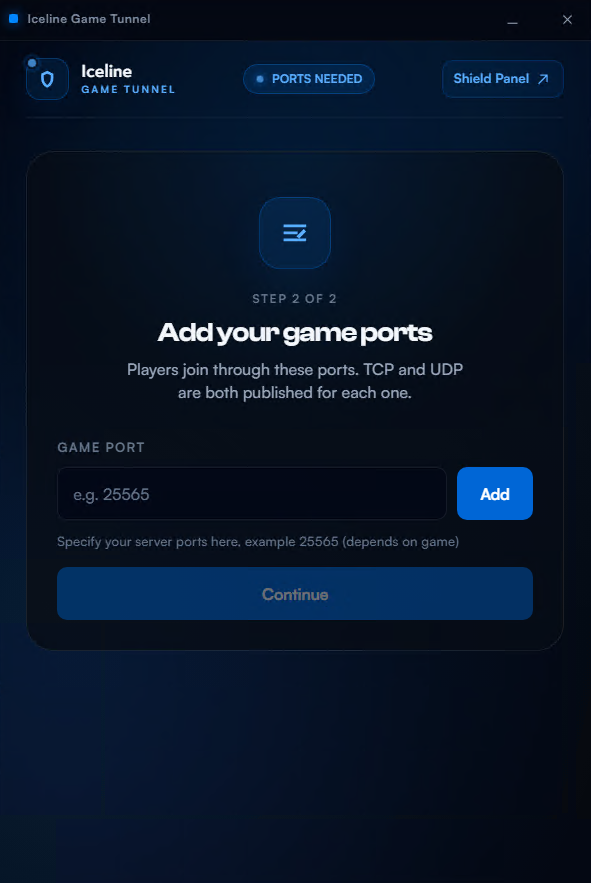
Step 5 — Add your game ports
On Step 2 of 2 — Add your game ports, enter your game's port (e.g. 25565) and click Add. Both TCP and UDP are published automatically. Click Continue.
Step 6 — Connect the tunnel
The app shows Disconnected with your player join address already generated. Click Connect
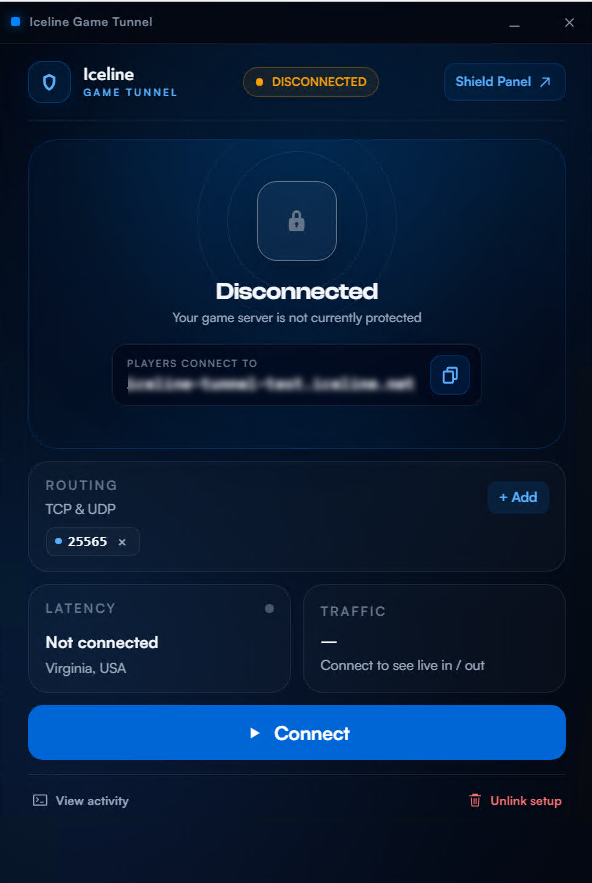
Step 7 — Verify the connection
Once linked, status switches to Connected (green lock icon). Confirm latency and traffic stats are populating.
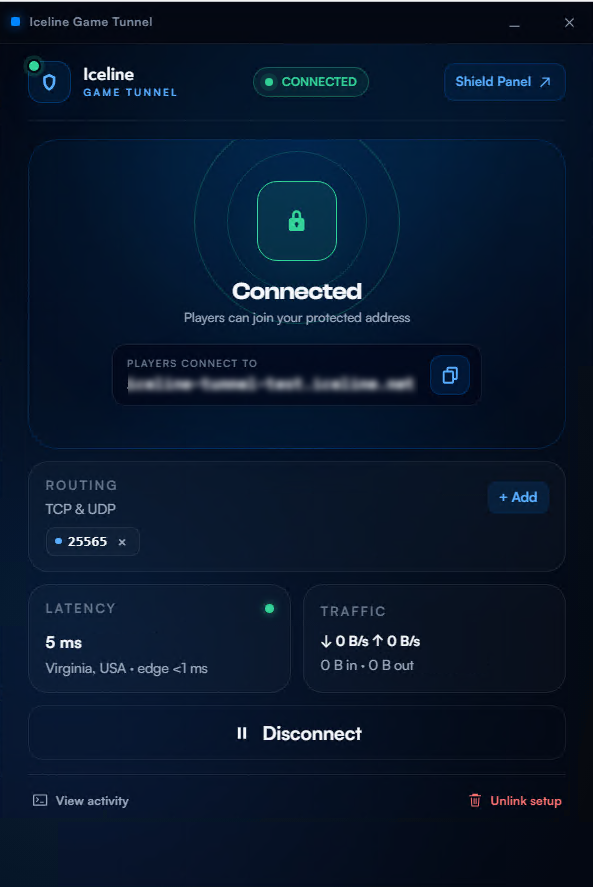
Step 8 — Point players at your tunnel address
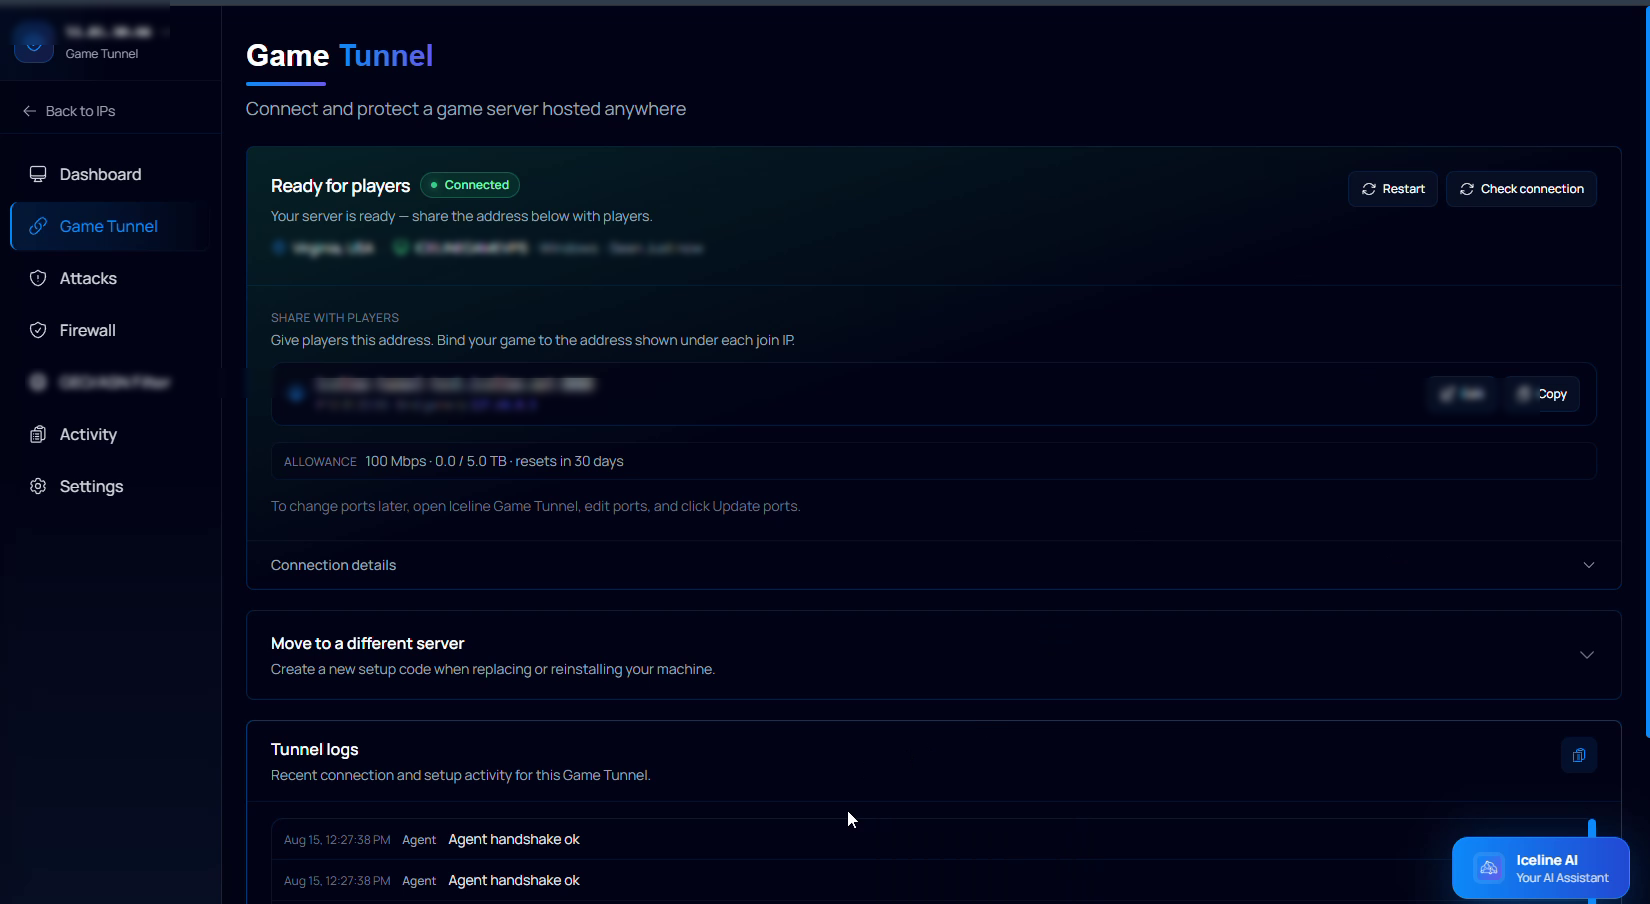
Back in the panel, the page shows Ready for players / Connected with your join address (e.g. yourname.iceline.net). Customize the subdomain and click Save.
127.66.0.2) — not 0.0.0.0 or your public IP. For Minecraft, set server-ip to that address.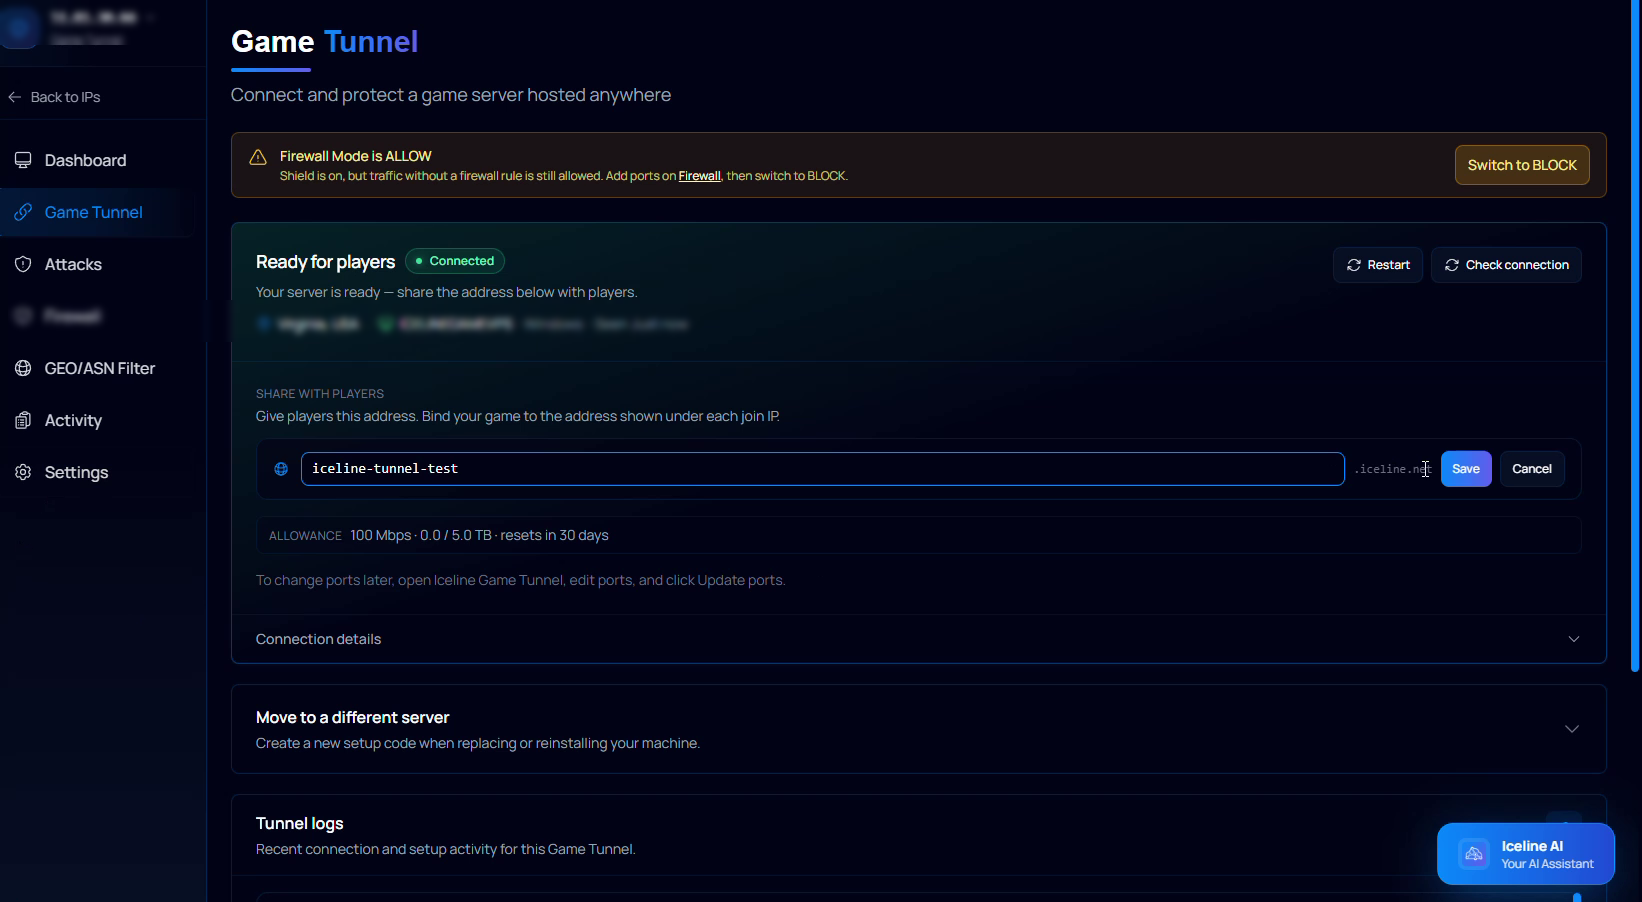
🐧 Linux Installation
Step 1 — Open Game Tunnel and choose Linux
In the Shield panel, select Game Tunnel and choose Linux. Copy the curl command shown.
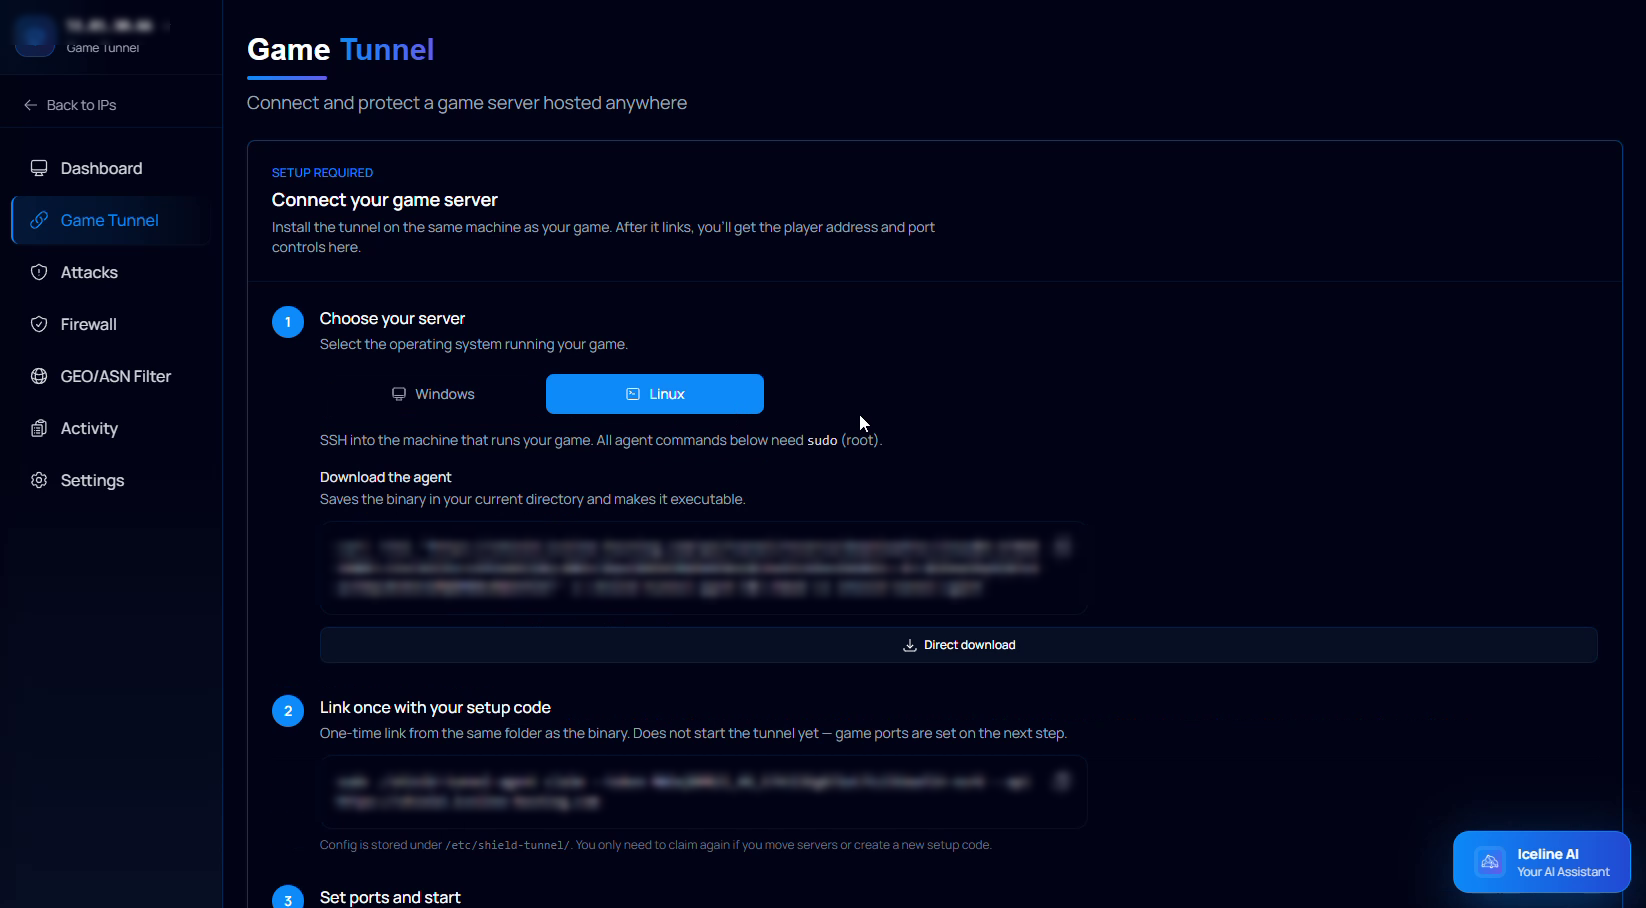
Step 2 — Download the agent on your server
SSH into the machine running your game (root or sudo) and paste the copied curl command. This saves a shield-tunnel-agent binary and makes it executable.

Step 3 — Link the machine with your setup code
This links the machine but doesn't start the tunnel yet.

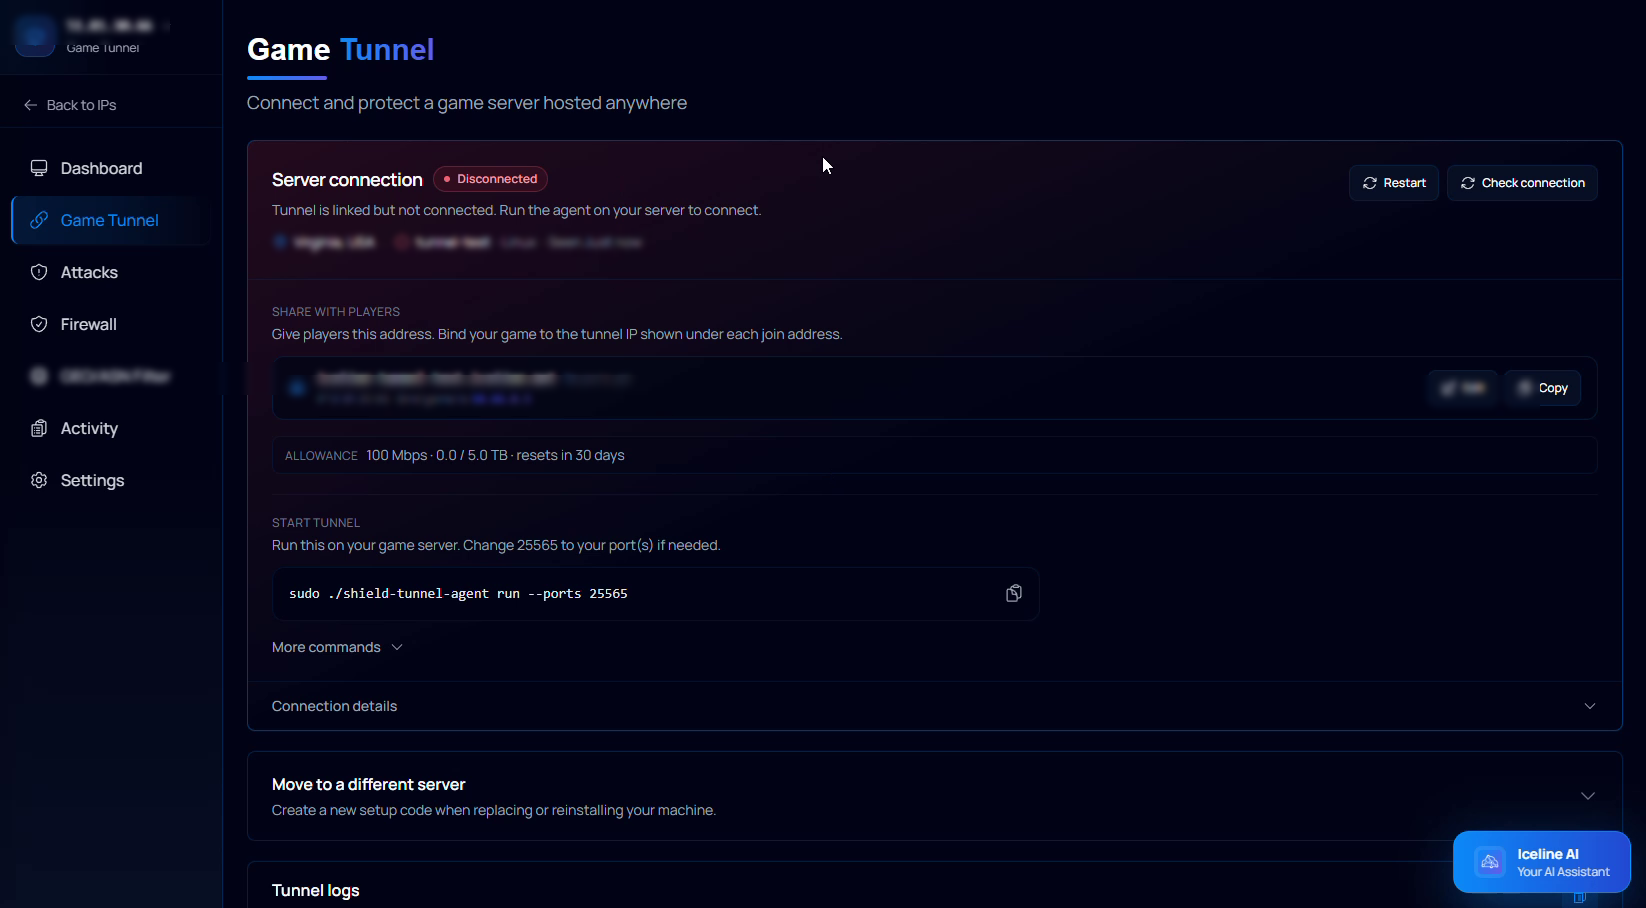
Step 4 — Start the tunnel with your game's ports
The panel shows Disconnected — Tunnel is linked but not connected, with the exact start command for your setup. Replace the example port with your actual game port(s), comma-separated for more than one.
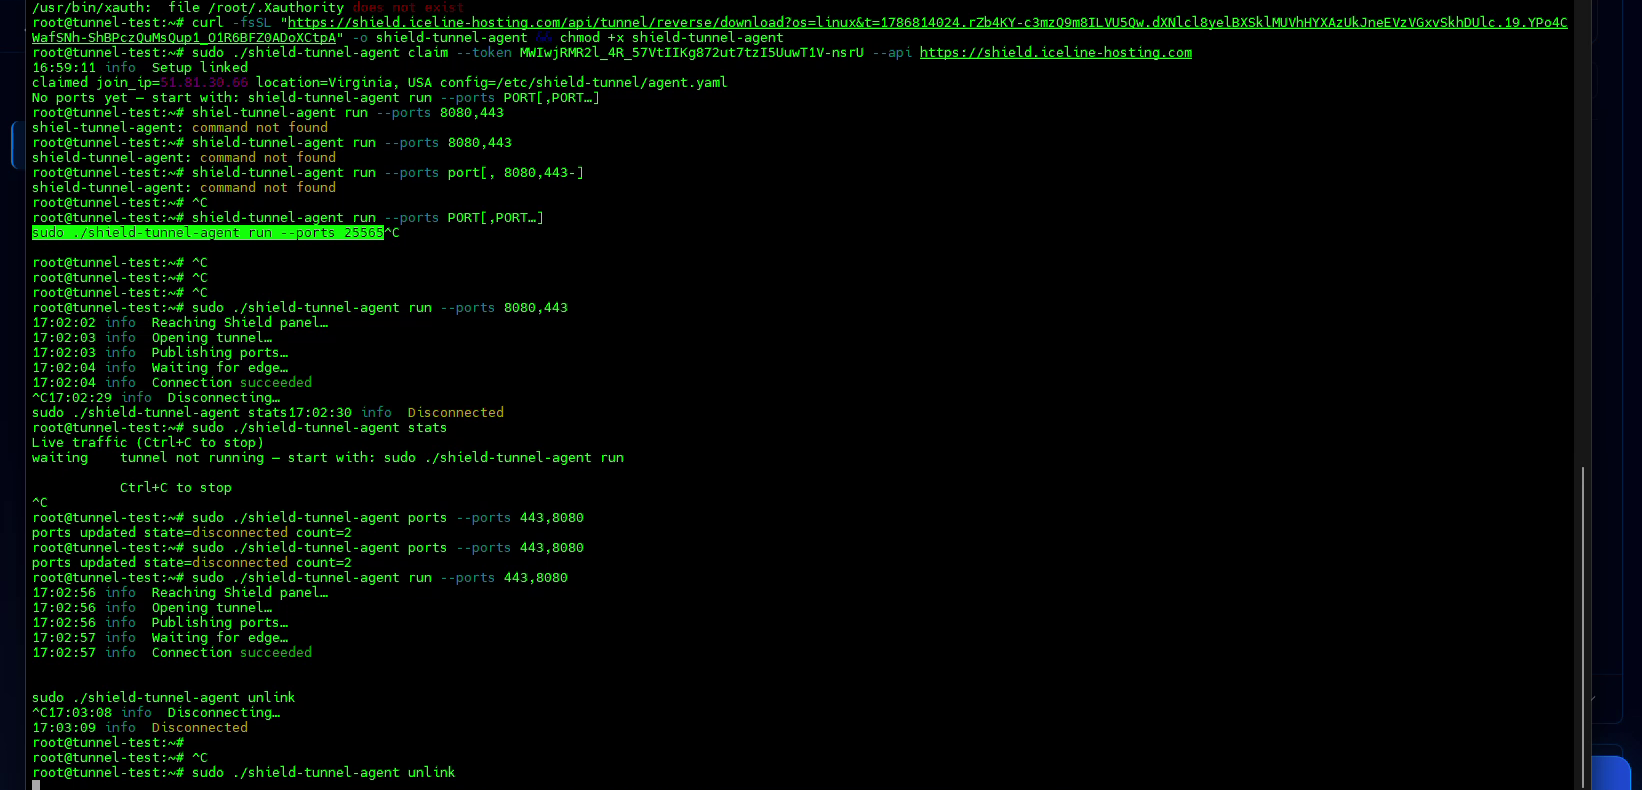
./ before the binary name (command not found), typo-ing the binary name, or literally typing the placeholder PORT[,PORT…] instead of a real port number.
A successful connection looks like this:
17:02:02 info Reaching Shield panel…
17:02:03 info Opening tunnel…
17:02:03 info Publishing ports…
17:02:04 info Waiting for edge…
17:02:04 info Connection succeeded

Step 5 — Verify the connection
The panel updates to Ready for players / Connected (green).
Step 6 — Point players at your tunnel address, and bind your game
Copy the join address under Share with players. Bind your game to the local address shown next to Bind game to (e.g. 10.66.0.5) — not 0.0.0.0 or your public IP.
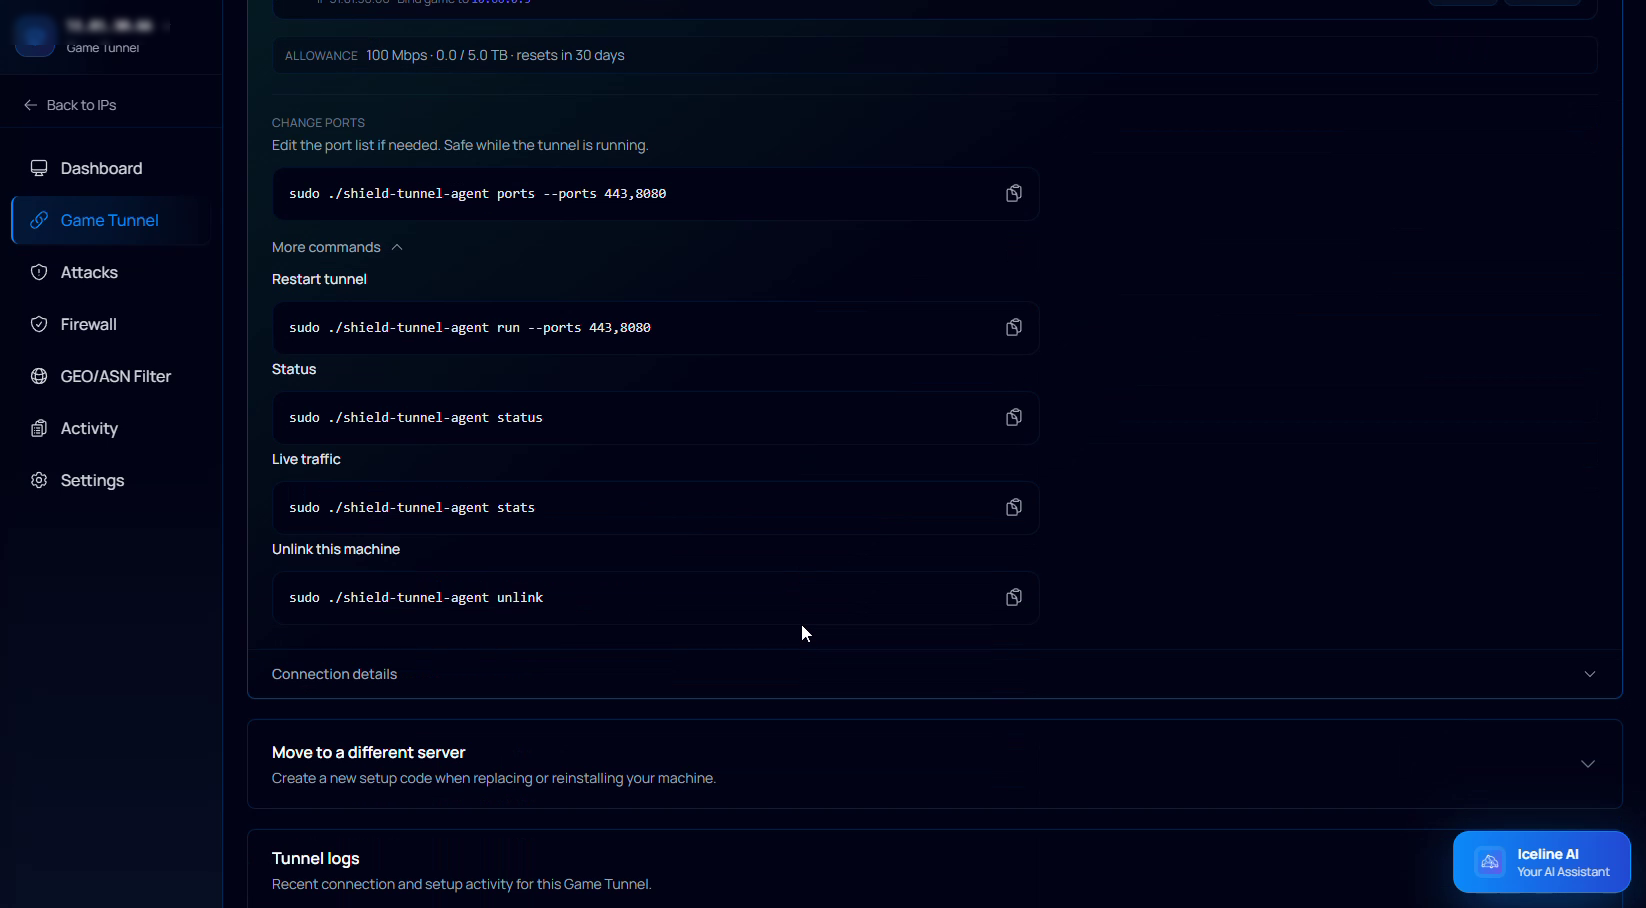
Useful ongoing commands
The panel's More commands section gives you the exact commands for this setup.
| Purpose | Command |
|---|---|
| Change ports while running | sudo ./shield-tunnel-agent ports --ports <ports> |
| Restart the tunnel | sudo ./shield-tunnel-agent run --ports <ports> |
| Check status | sudo ./shield-tunnel-agent status |
| Live traffic | sudo ./shield-tunnel-agent stats |
| Unlink this machine | sudo ./shield-tunnel-agent unlink |
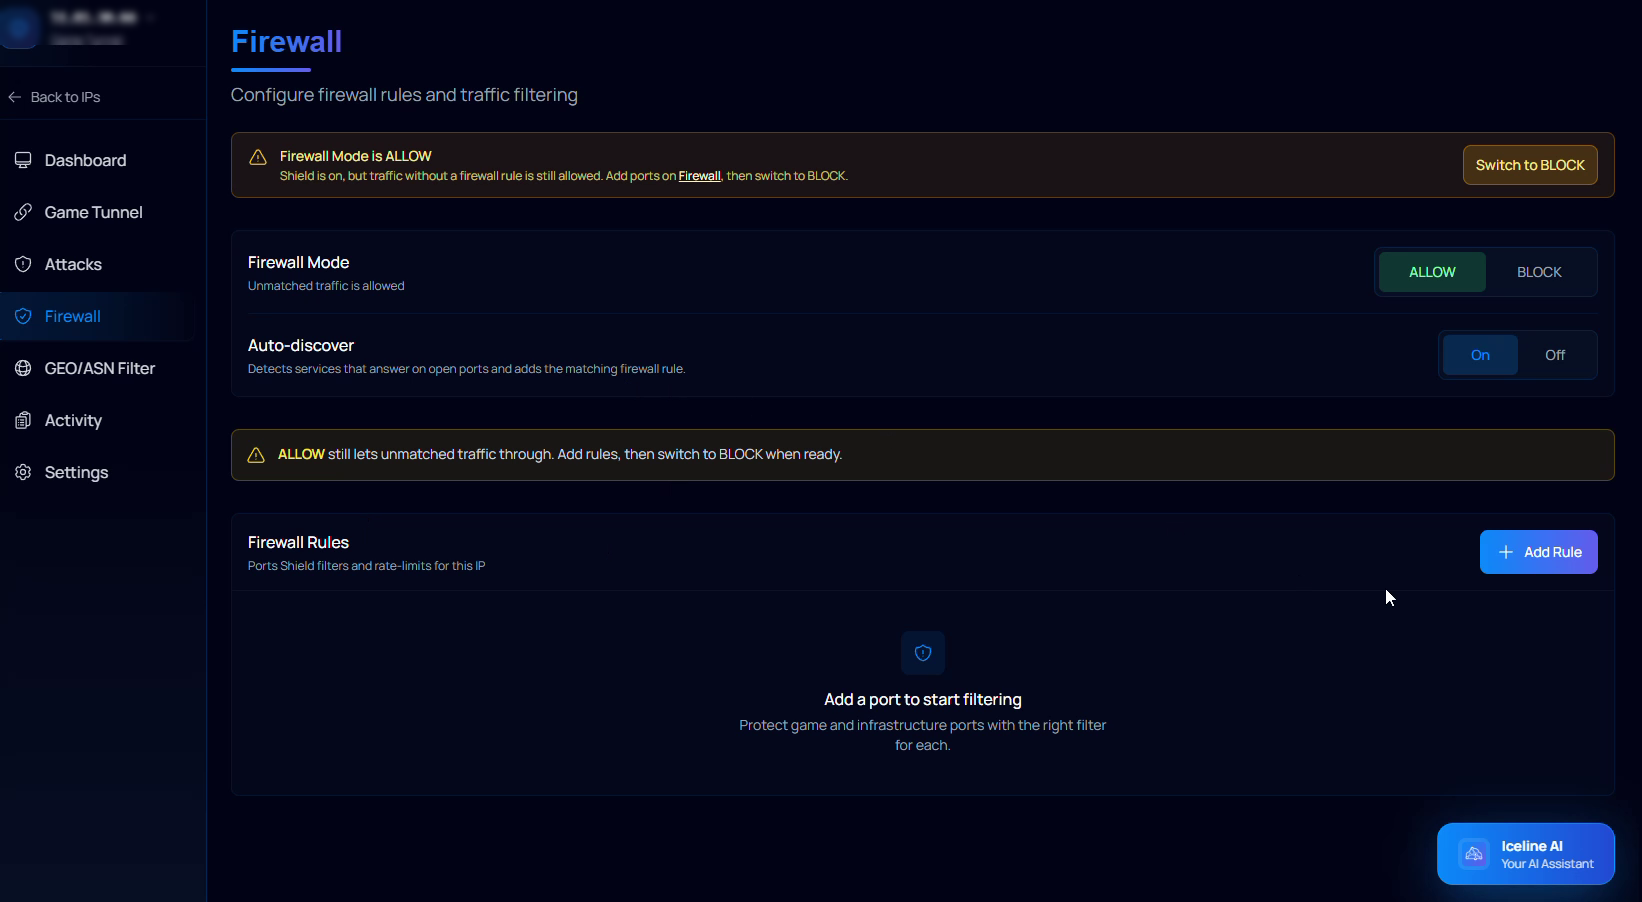
Firewall setup — same for both OS
Configure your firewall
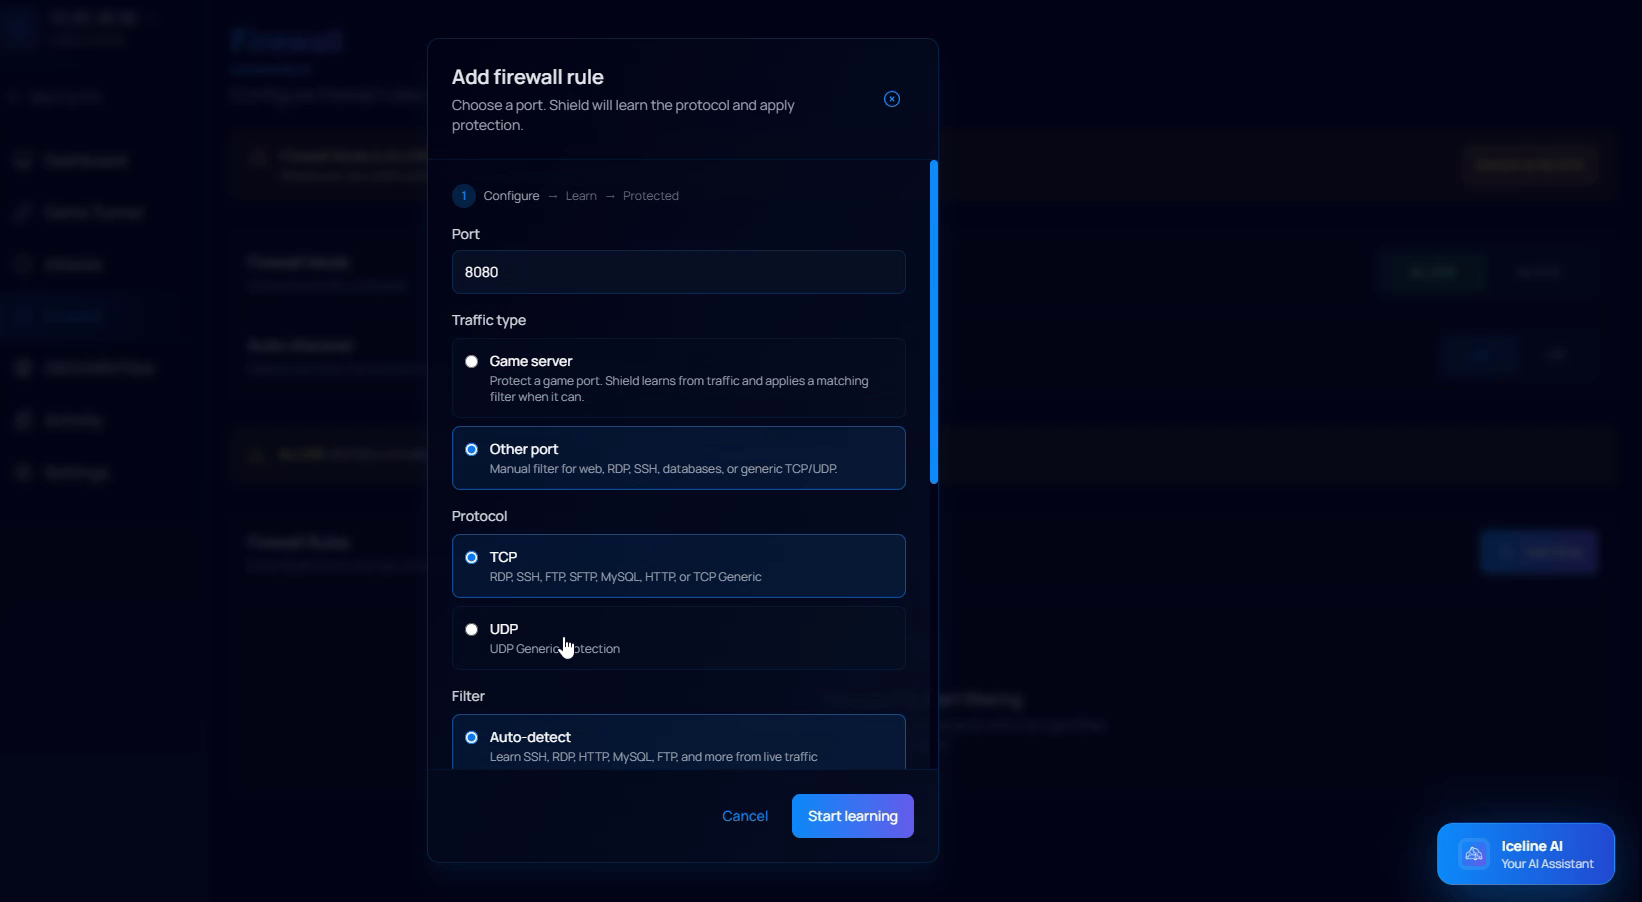
Go to the Firewall tab. Shield starts in ALLOW mode — traffic that doesn't match a rule yet is still let through. Add a rule for your game port before switching to BLOCK.
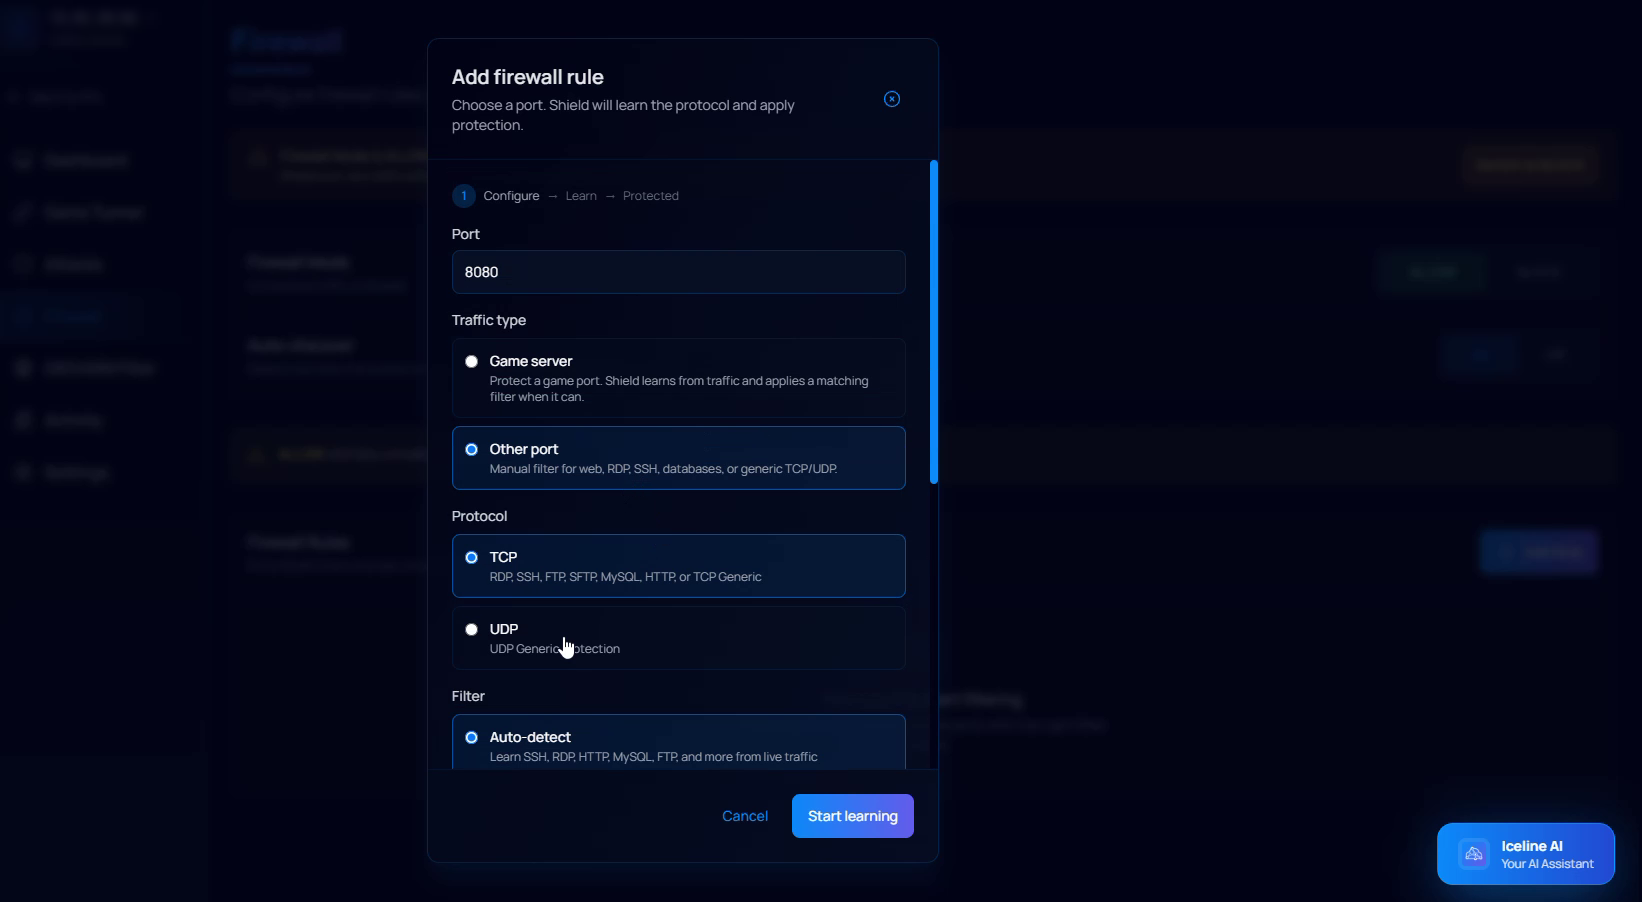
Add a firewall rule
Click Add Rule, enter your port, choose Game server as the traffic type, pick TCP and/or UDP, and leave Filter on Auto-detect. Click Start learning.
Switch to BLOCK once the rule is active
The rule shows Waiting for traffic… until players connect and Shield finishes learning. Once out of learning mode, switch Firewall Mode from ALLOW to BLOCK.
Optional — additional protection
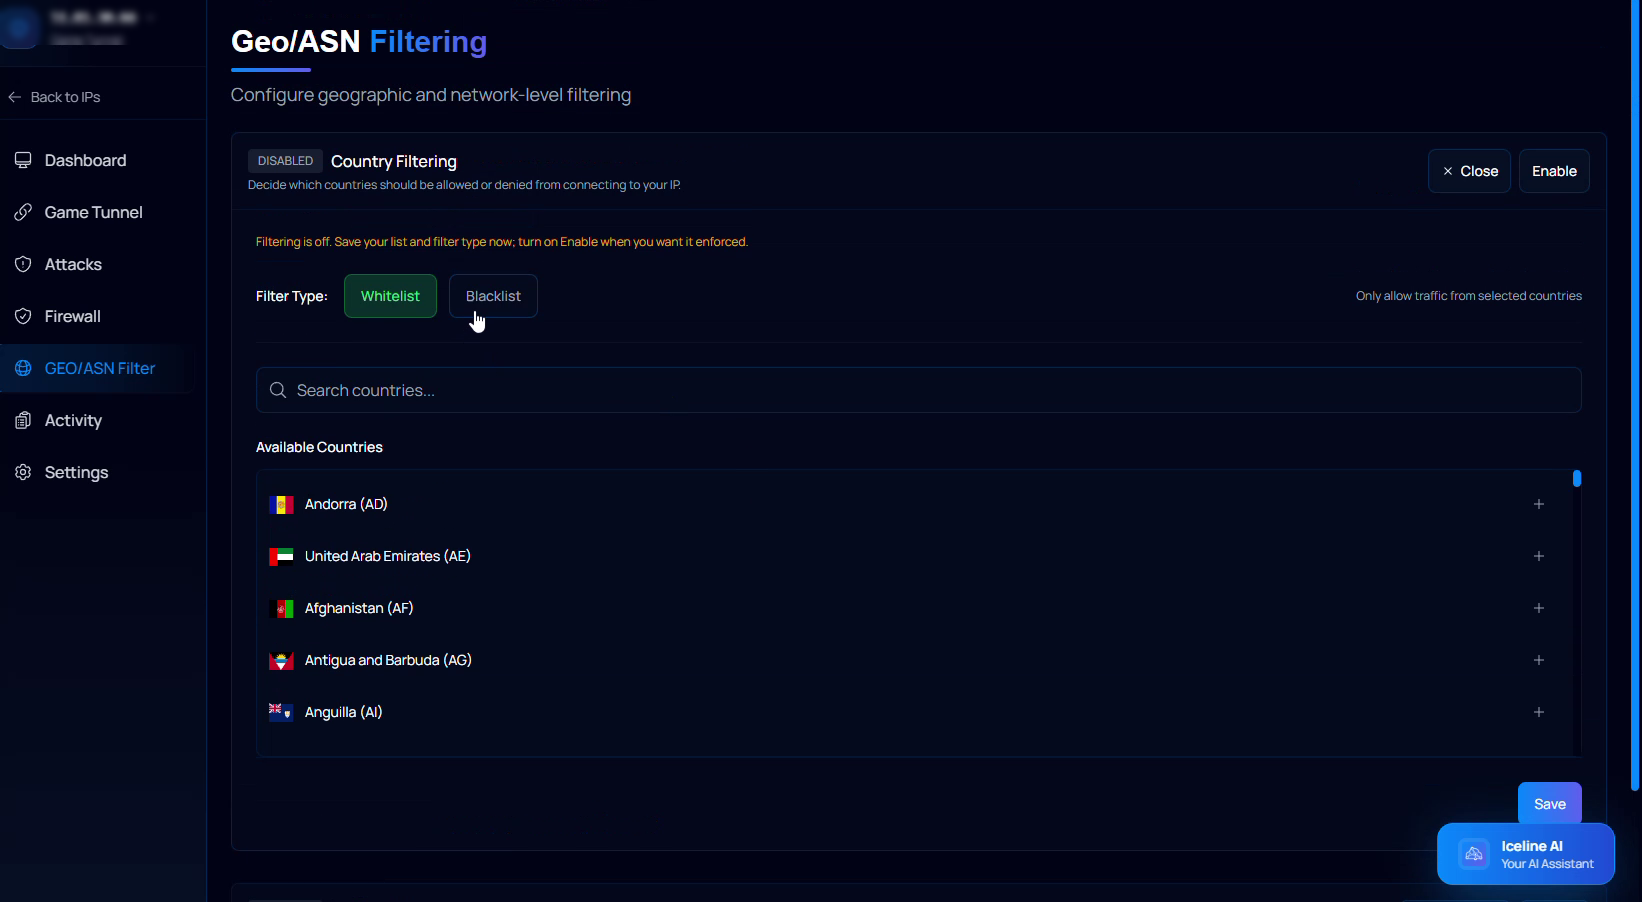
Geo/ASN Filtering
Whitelist or blacklist traffic by country.
Removing the tunnel
Windows
Open Iceline Game Tunnel and click Unlink setup (bottom right). The app shows Unlinking… while it removes the link from your panel.
It resets to Step 1 of 2 — Link this machine, and the panel issues a fresh setup code.
To fully remove the app, delete Iceline_Game_Tunnel.exe — no separate uninstaller since it isn't installed through Program Files.
Linux
sudo ./shield-tunnel-agent unlink
Disconnects the tunnel and removes the link — you'll see Disconnecting… then Disconnected.
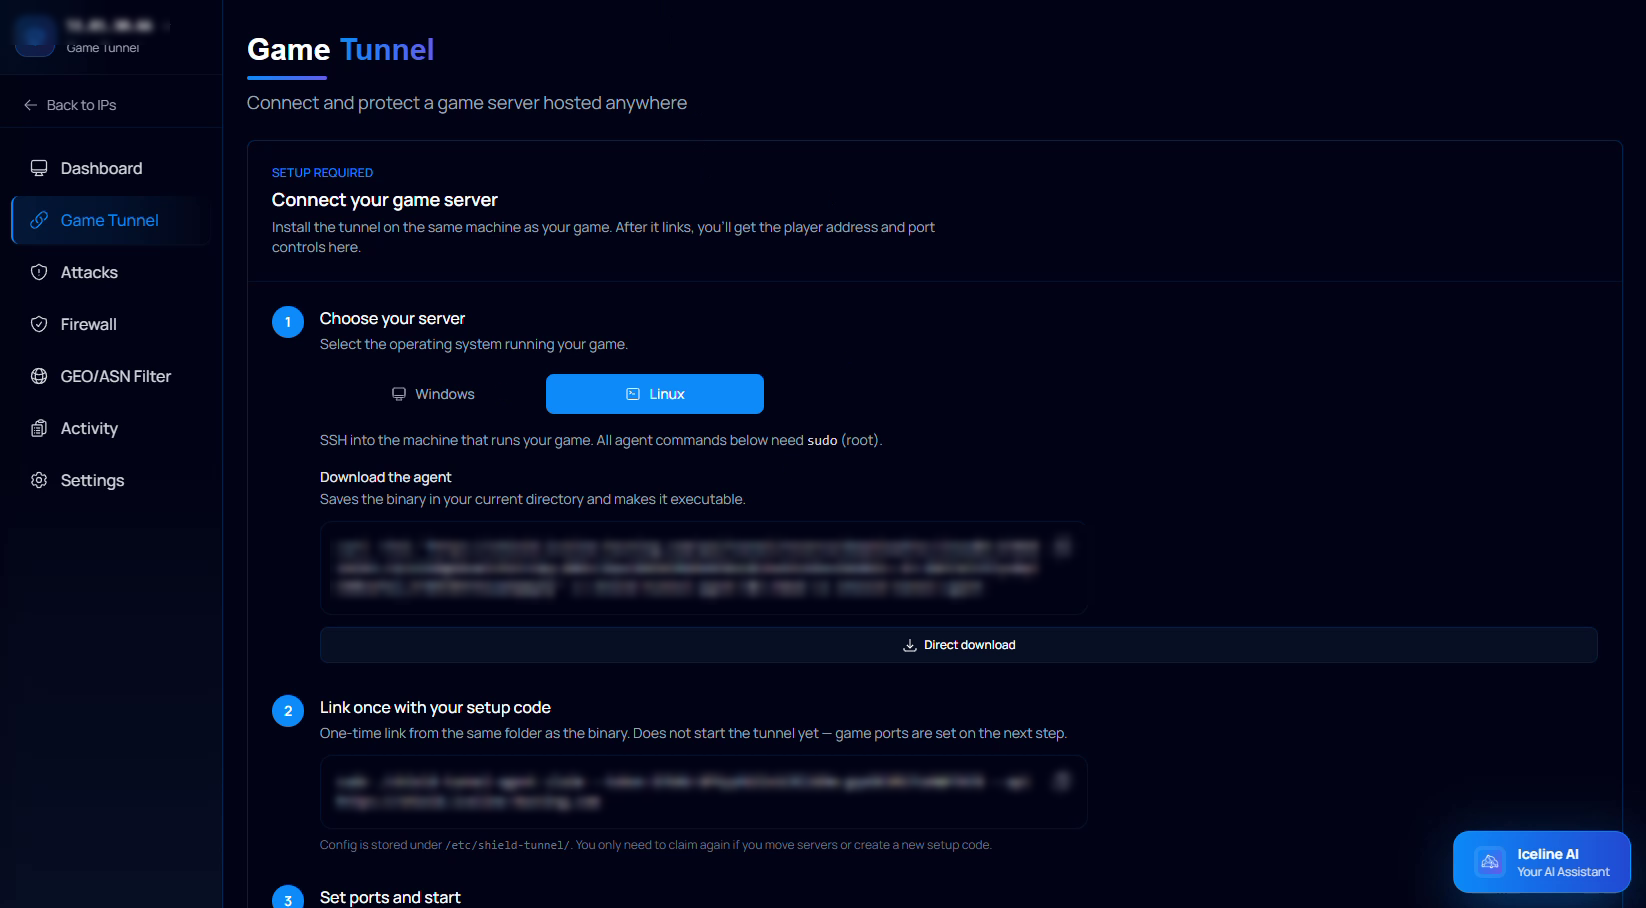
Panel resets to Setup Required with a fresh setup code and download command.
To fully remove the binary, delete shield-tunnel-agent
Getting help
Ask Iceline AI
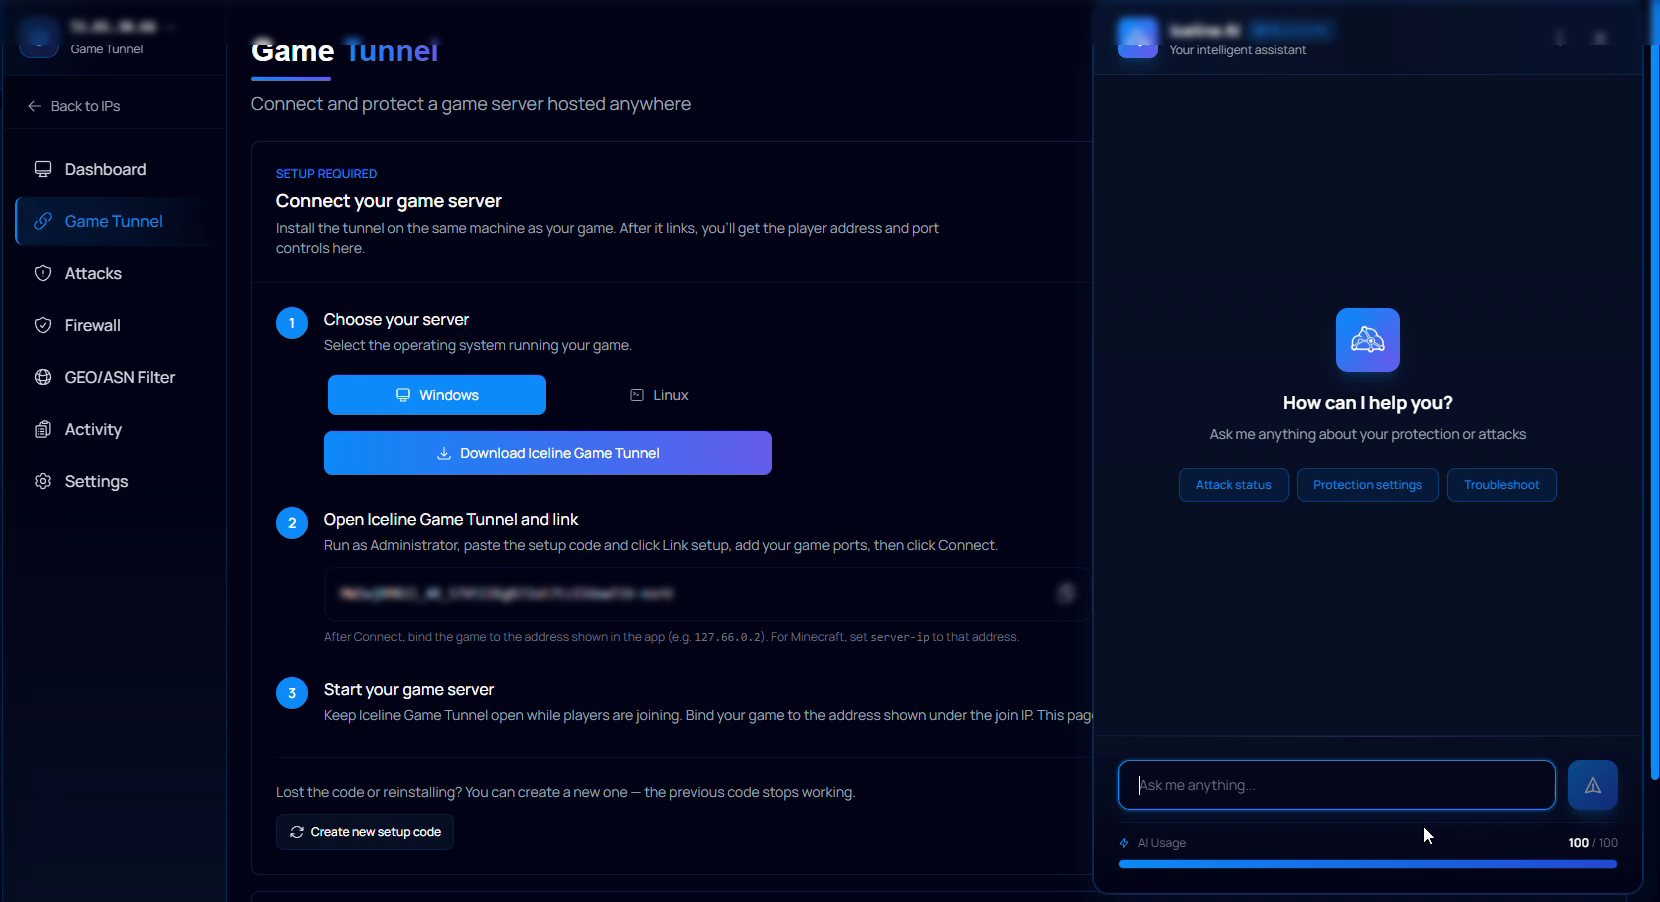
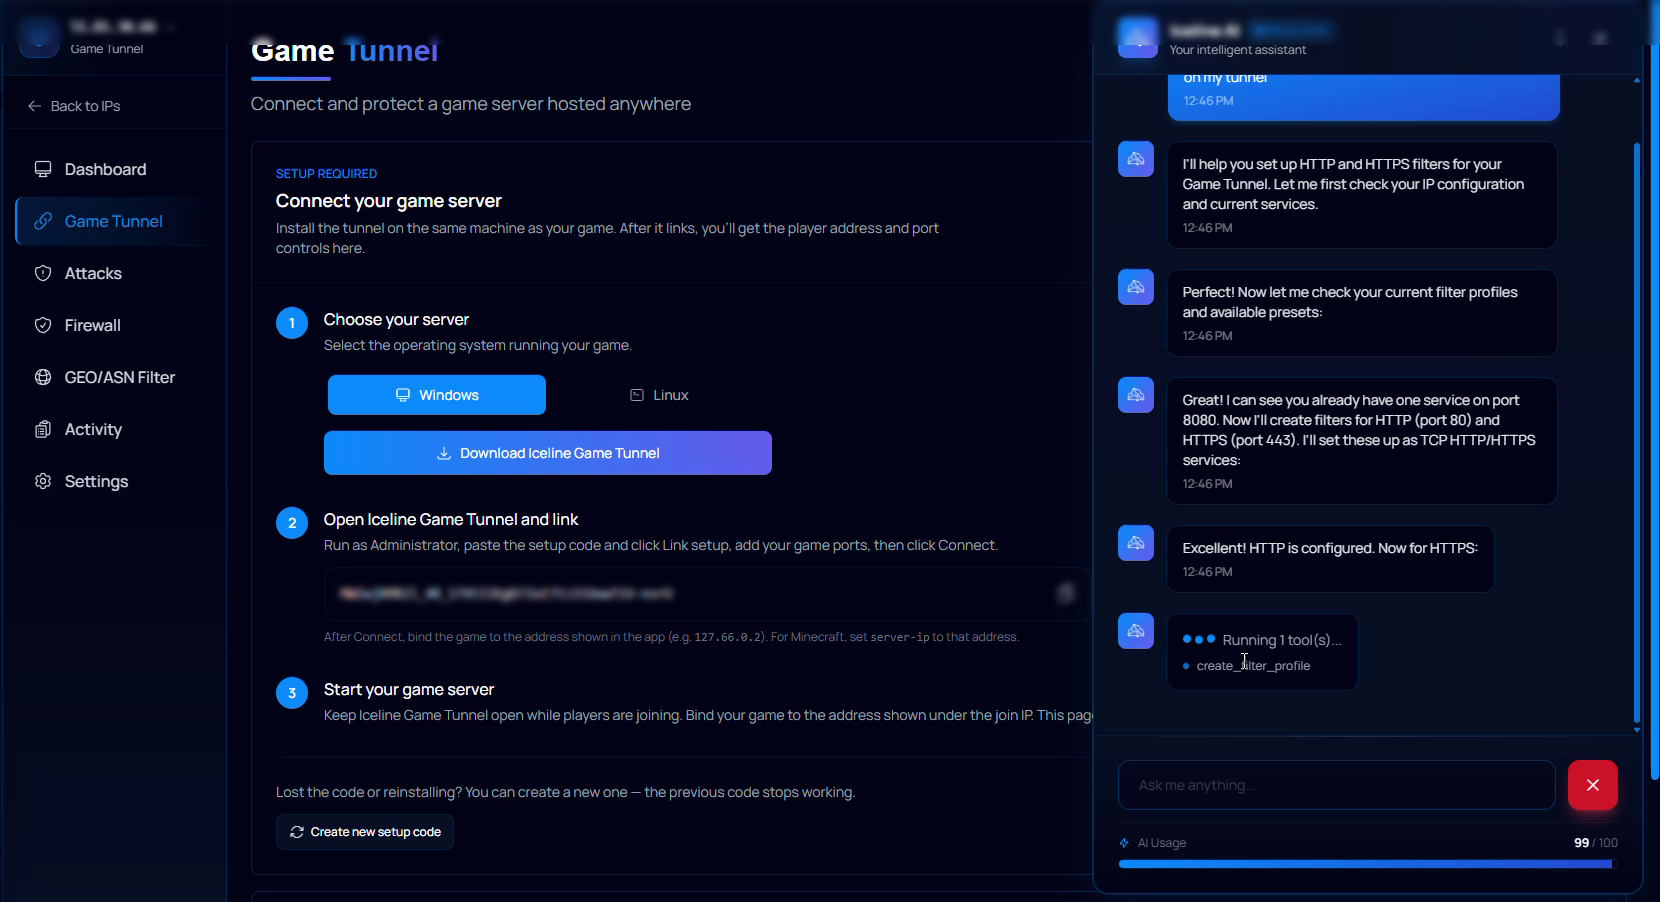
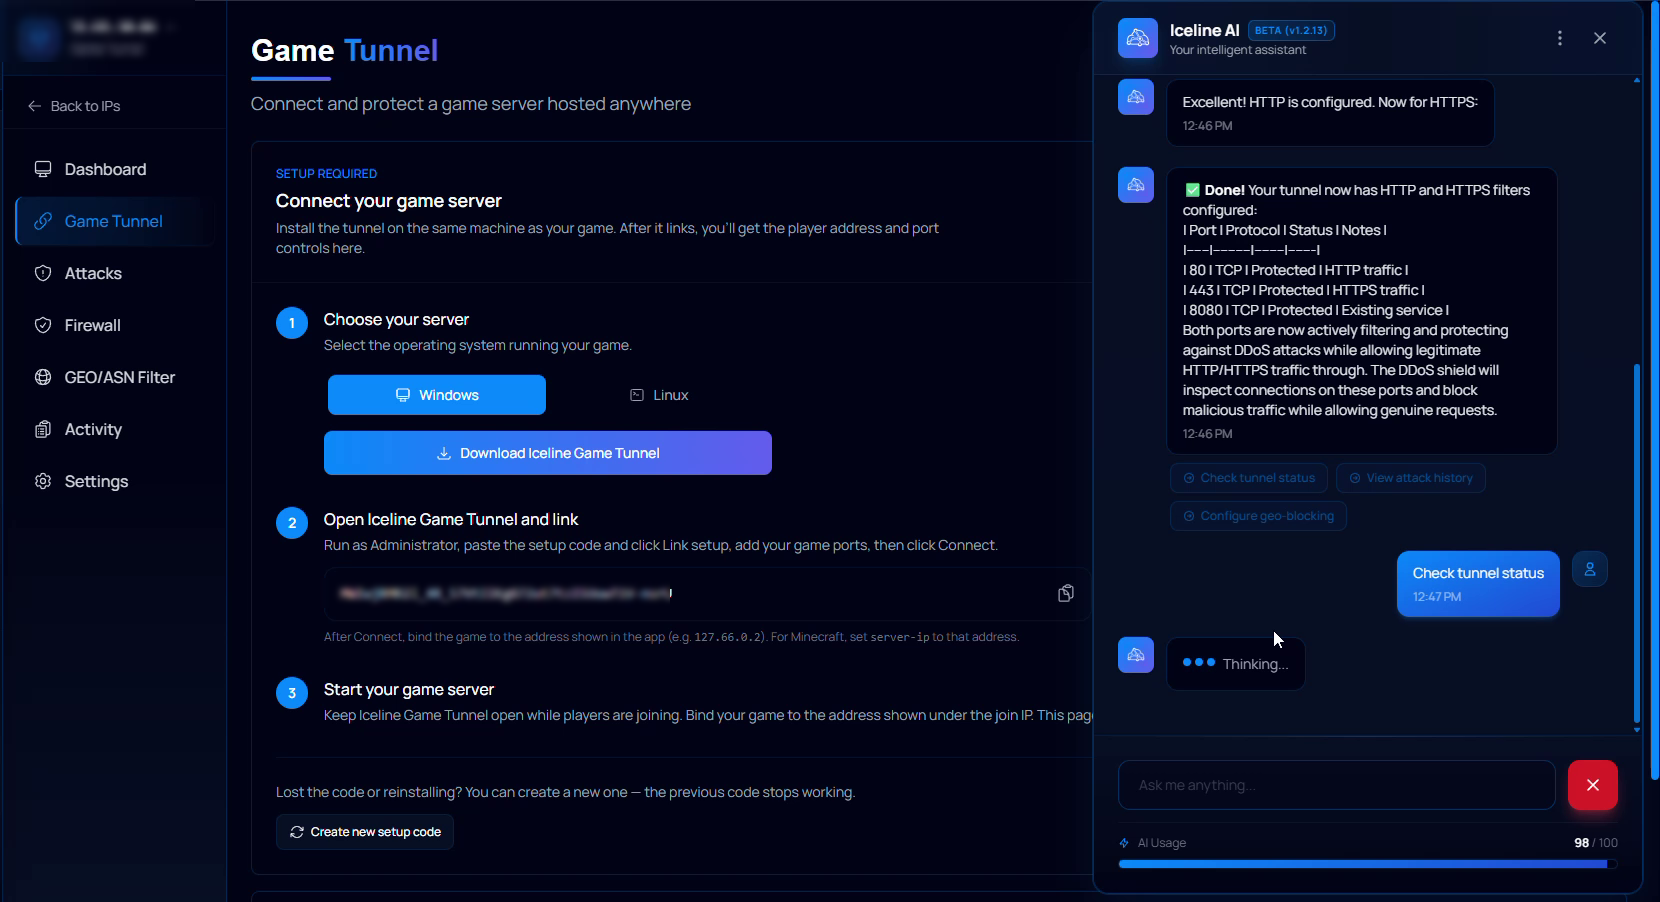
The assistant built into the Shield panel (bottom-right chat bubble) can check your setup and make changes for you. Proposed changes show up as a tool call with exact parameters, and nothing happens until you click Confirm.
Open a support ticket
For anything else, or if you'd rather talk to a person.